• WooCommerce Schnittstelle
The WooCommerce interface saves time and workload. You no longer have to enter the data manually, but can import all your data automatically and shipping labels can be created with just a few clicks. Furthermore, the tracking IDs are automatically stored in WooCommerce.
To be able to use the WooCommerce interface, you need to create a one-time personal API key and connect to your WooCommerce account.
The following 3 steps are required for this:
Step 1: Creating the personal API key
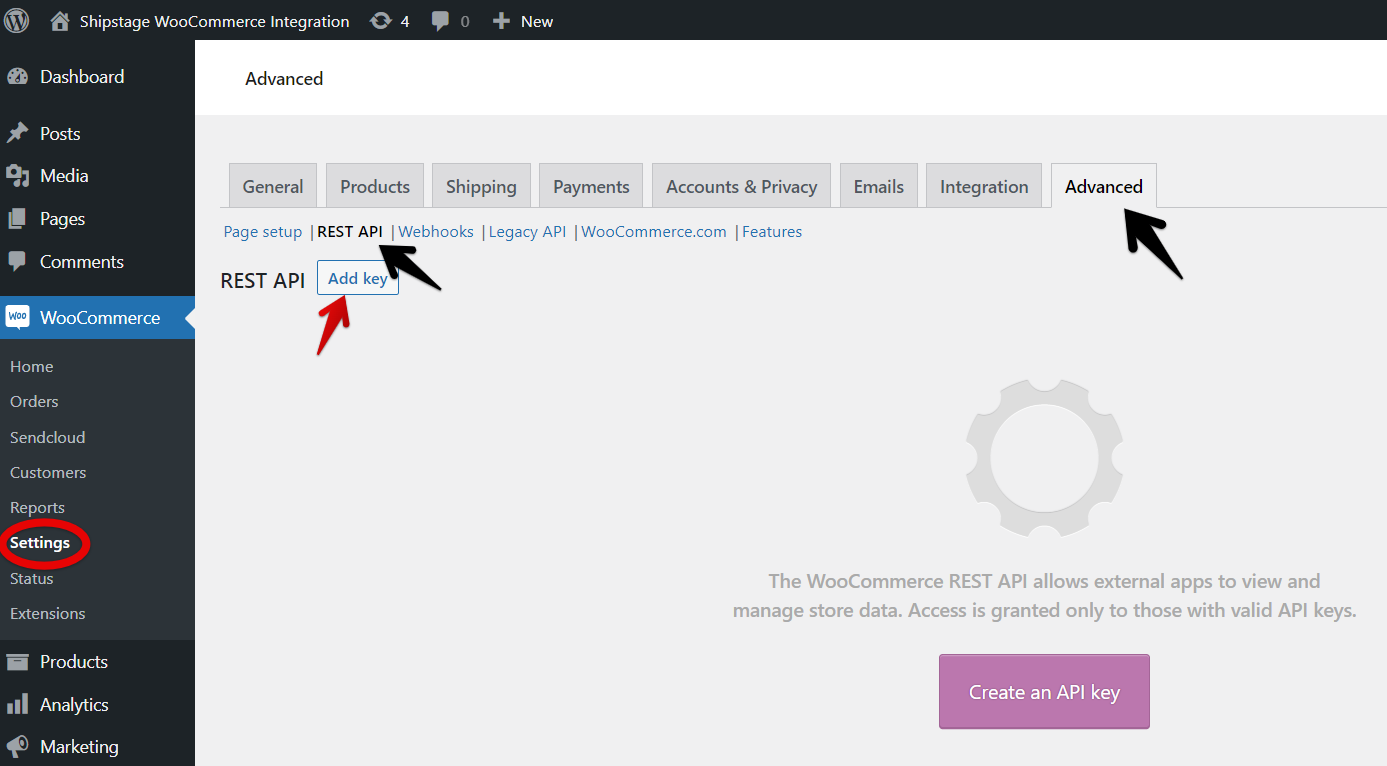
1. Open your WooCommerce account in WordPress and go to the Settings area.
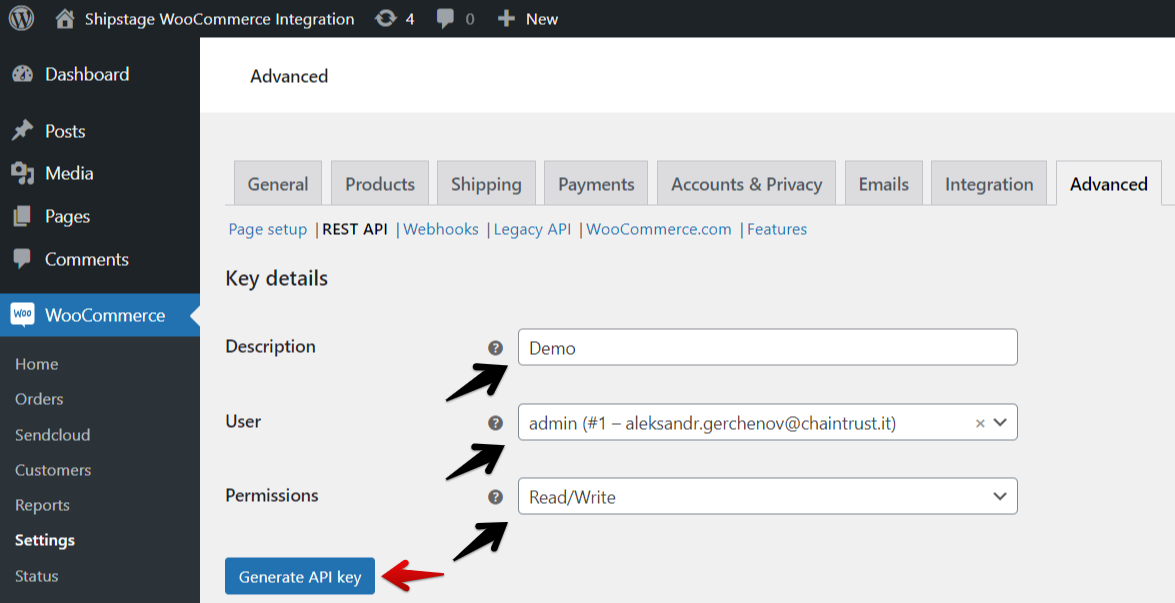
2. Select the “Advanced” tab and then the “REST API” tab.
3. Click on “Add key”.
4. Describe your key (e.g. with the name of your company) and select the responsible user.
5. Make sure that the “Read/Write” permission is assigned under “Permissions”.
6. Click on “Generate API key”.
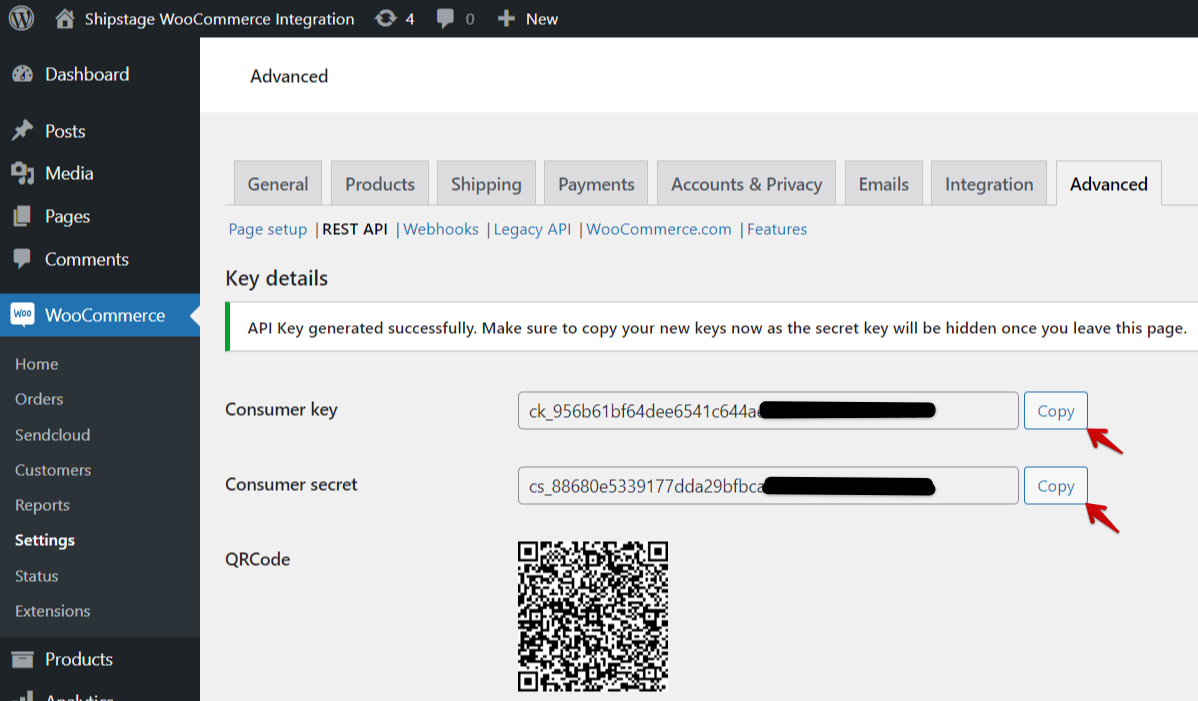
7. You can now see two keys and a QR code.
8. Copy both keys into a separate document for safekeeping, as they will not be displayed a second time. Otherwise step 1 will have to be repeated.
Step 2: Integration
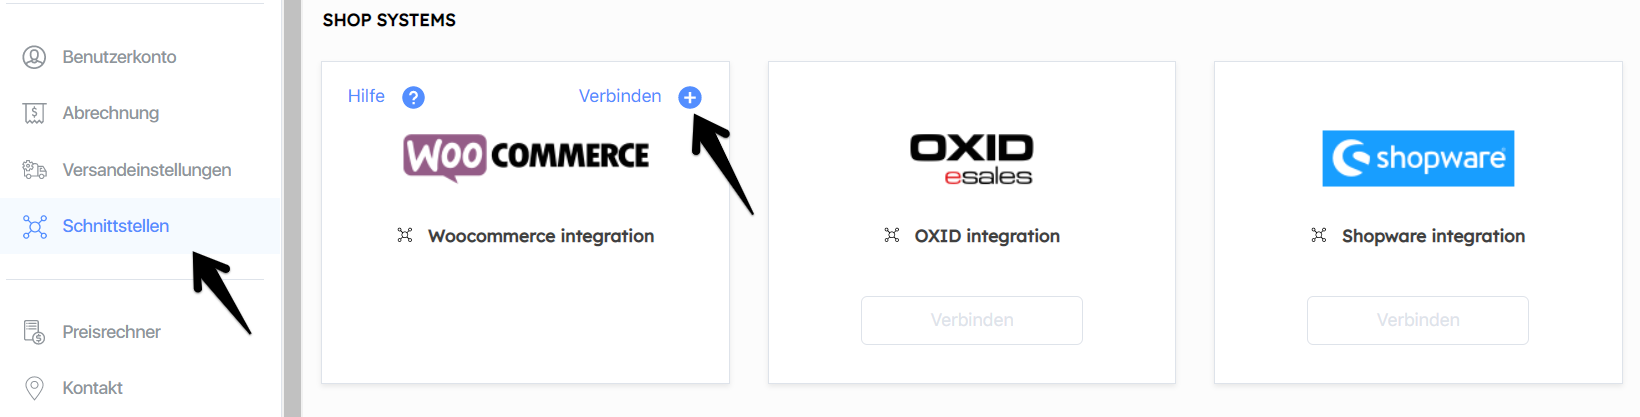
1. Go to the menu item Integration on our Shipstage page.
2. Select WooCommerce under “Shop Systems”.
3. Click on “Connect”.
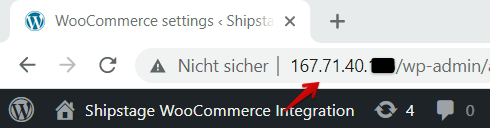
4. Enter the name of your shop or the name of the account and enter the base URL of your WooCommerce account.
5. Insert the two keys you created in step 1 here.
6. Click “Add”.

Step 3: Automatic data transfer
The interface is now permanently set up. It enables automatic data transfer. All data from WooCommerce is transferred to the “Unpaid packages” and the dispatch notes can be created.
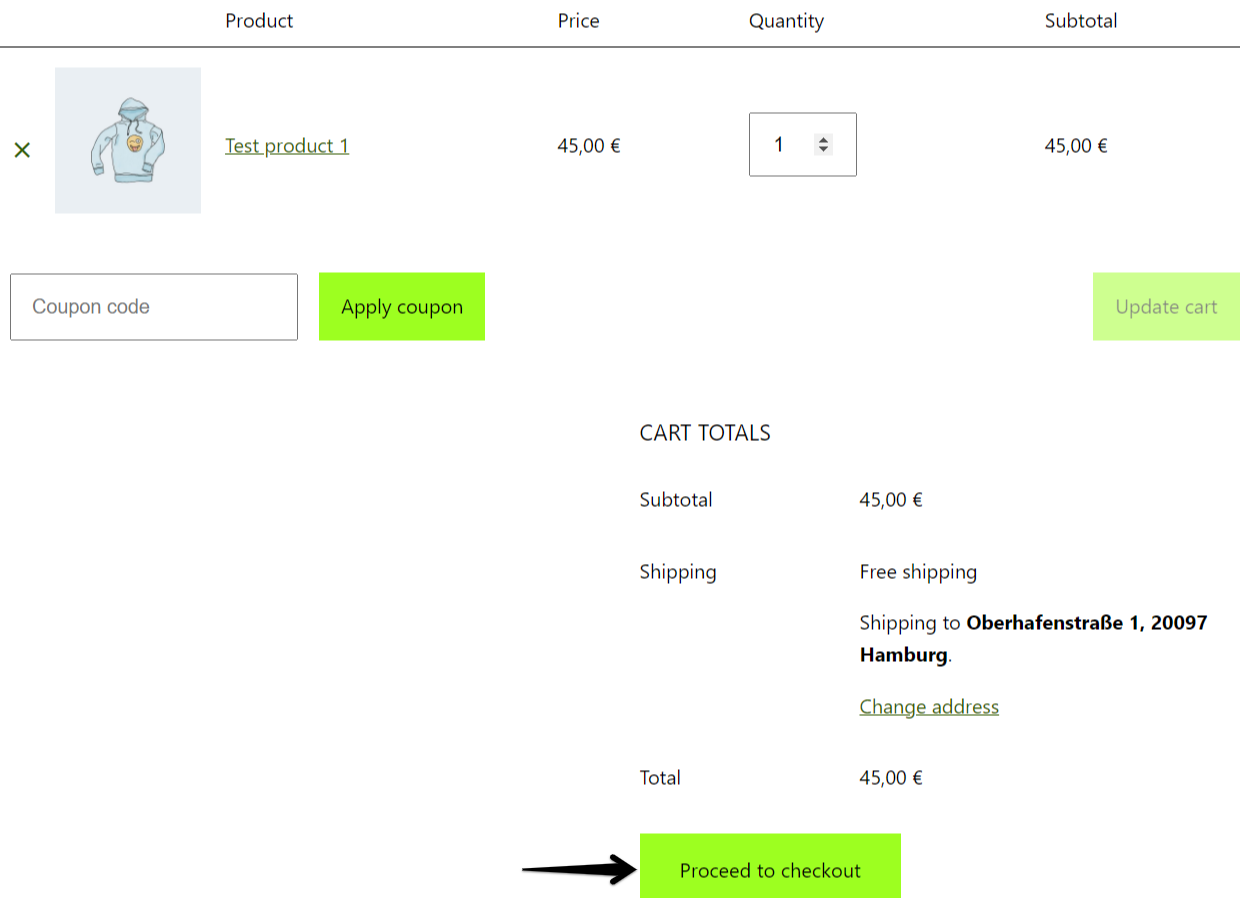
To check this, you can create a new order in your shop and import the data directly:
1. Open your own shop and complete an order.
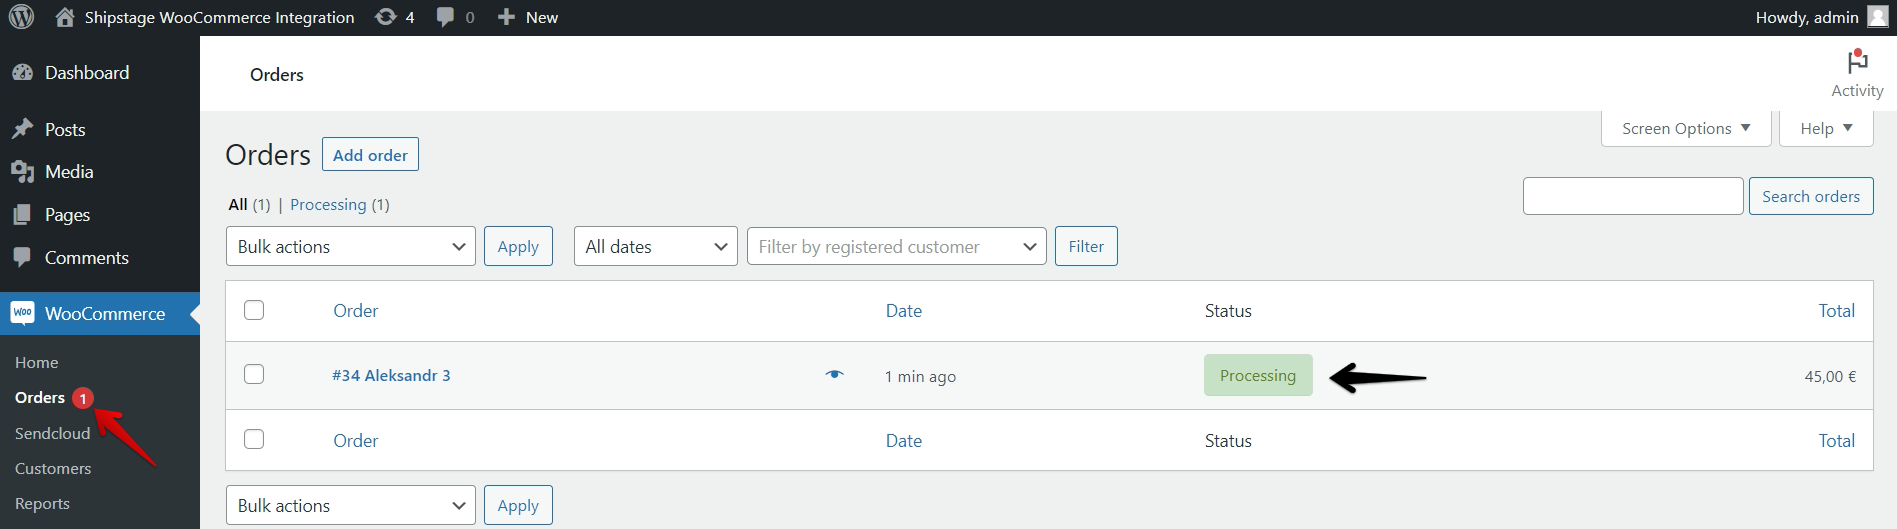
2. Go to the orders tab on the WordPress page.
3. There you will see your newly created order with the status “Processing”.
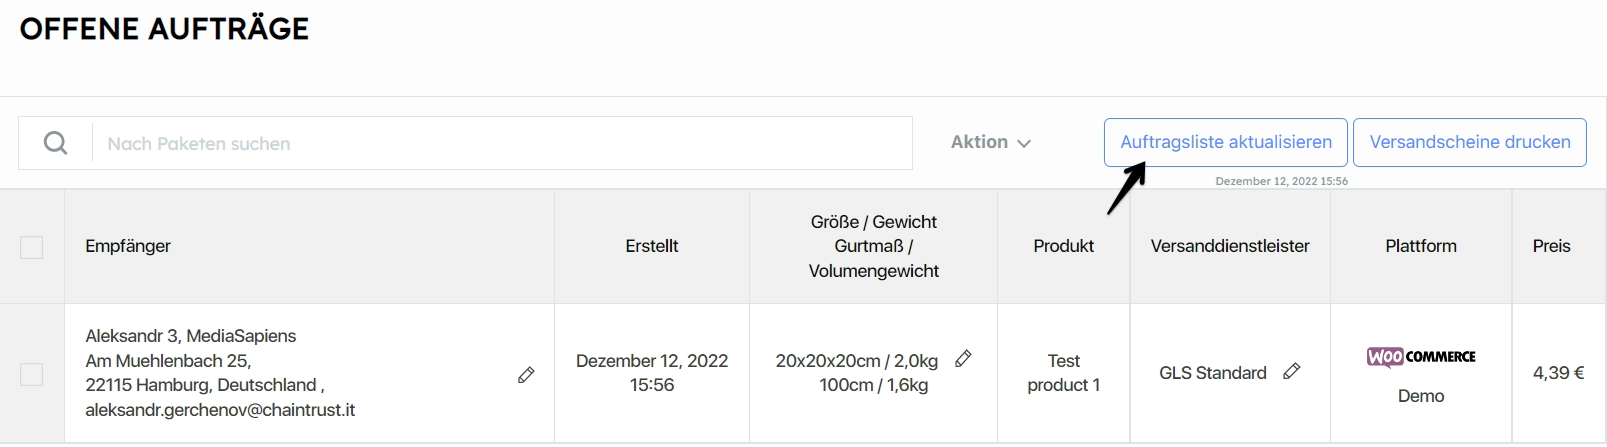
4. Now open the “Unpaid packages” on Shipstage.
5. Click on “Update order list”.
6. The order data is transferred and you can create a dispatch note as usual.